Showing posts with label Cookies. Show all posts

Friday, December 16, 2011

Candy Cane Cookies and Tuxedo Peppermint Bark


A little more than a week until Christmas! If you’re looking for a way to use candy canes, here are two traditional recipes. One is easy (the bark); the other takes a little more finesse (the cookies). But both are festive and yummy.

Peppermint Bark
1 bag bittersweet or dark chocolate chips (I like Ghirardelli)
1 bag white chocolate chips
12 mini candy canes, semi-crushed (1/3 cup or so)


1.) In the microwave, melt the chocolate chips in two separate bowls on 50% power.
2.) Line a 9”x13” cookie sheet with parchment paper.
2.) Spread the dark chocolate chips on the paper. Dollop and drizzle white chocolate on top and swirl with a knife to get the marbled effect.
3.) Sprinkle with crushed peppermint candies. Press the candy lightly into the chocolate with the back of a clean spoon.
4.) Refrigerate for 30 minutes to harden. Break apart into pieces. Store at room temp or refrigerate.

Candy Cane Cookies
Adapted from Christine’s Cuisine blog post.
2 sticks unsalted butter, softened
1 cup confectioners sugar
1 egg
1 1/2 tsp almond extract
1/4 tsp peppermint extract
2 1/2 cups all-purpose flour
1 tsp salt
Wilton’s No Taste Red food coloring gel

1.) Blend butter, sugar, eggs and almond flavoring.
2.) In a separate bowl, combine flour and salt.
3.) Add the dry mix to the wet mix in batches until combined.
4.) Remove half of the dough from the bowl. Color the remaining dough with the red food coloring and flavor with peppermint extract.
5.) Place each half of dough in separate containers in the fridge. I form the dough into two balls and wrap in Saran Wrap. Let chill overnight if possible. The longer they chill, the easier the dough is to handle. You can also spoon the dough out in small teaspoons on two separate plates and cover with Saran Wrap so they’re ready to go the next day. This might also help the dough chill more quickly if you want to bake the cookies the same day.
6.) Using confectioner’s sugar to coat your work space, roll out a tsp-size white dough ball and one red into 4-inch snakes. (You’ll be surprised at how little dough it takes to get a 4-inch snake.) Pinch the ends together and roll the dough so that the two colors twist like a candy-cane pattern. Place on a parchment-lined baking sheet.
7.) Unwrap and crush enough candy canes to equal about 1/2 cup. You want the candy pretty fine, almost like a sugar consistency with some slightly larger chunks for color. I used about two dozen mini candy canes to achieve the 1/2 cup. The boys had fun crushing them with a rolling pin in a quart-sized freezer bag. Set candy aside.
8.) Bake in a 375’ oven for six to eight minutes.
9.) Immediately remove the cookies from the oven and sprinkle with crushed candy. The candy will melt slightly and adhere to the cookie. Let cool before moving from pan to a wire rack to cool completely. Cookies will be tender with a little candy crunch.

Monday, December 12, 2011

Christmas Tree Cookies

christmtastrees1
I never learn. Several years ago I made the mistake of scheduling my annual physical in January. Stepping on that scale was a big wake up call. Holy cookies and crumb-cakes Bat Man! But this year I’ve done one worse. We have a Caribbean vacation planned for January. As in bikinis and beaches and lots and lots and lots of candid photo opportunities. Yeah


I’d like to say that this has motivated me to find healthier ways to bake, but I’m just too stuck in my ways. Instead, I’m making less of the good stuff. Like these Christmas cookies. We all love these little guys. We love frosting them. We love decorating them. But most of all we love eating them. (Any May I Please Have a Cookie? fans out there?). I’m happy to share the recipe with you though. Does that cut calories?
christmtastrees2
Basic Rolled Sugar Cookies4-5 dozen cookies, depending on the size of your cookie cutter
3 sticks butter, room temp
2 cups sugar
4 eggs
1 tsp almond flavoring
5 cups flour
2 tsp baking powder
1 tsp salt
1.) Cream butter, sugar and eggs.
2.) In separate bowl, mix together dry ingredients and add to wet ingredients in batches.
3.) Cover and chill overnight if you can.
4.) Roll out dough to 1/4” thick and cut in tree shapes. Helps to flour the cookie cutter.
5.) Bake 400’ for 6-8 minutes. Let cool completely and brush away any crumbs before frosting.

In the past I’ve made royal icing, but I’ve returned to good, old-fashioned shortening-based decorator frosting. We just prefer the taste. The frosting sets up overnight, and you can stack them in a container the next day. The hot dots candies help cushion the trees too.

Shortening Decorator Frosting
4 cups confectioner sugar
1/2 cup shortening
5 Tb milk (plus more until right consistency)
1 tsp vanilla
1.) Cream all ingredients together. Add more milk until desired consistency.
2.) For the cookies above I used Wilton’s leaf green food gel.
3.) We love rainbow sprinkles and hot dots for decorating but you can always get fancy too.
4.) Freeze any leftover frosting and re-use it at a later date. You’ll never know the difference.

Just a word about timing. I confess that when I do these cookies every year I usually take a few days. I make the dough one night. Put it away. I bake the cookies off the next day and let them cool. The day after that I make the frosting and we decorate. The next day we eat them all. You get the idea.

Friday, December 2, 2011

Double Chocolate Orange Biscotti

I’ve been cooking and baking like a mad woman lately, which also means I’ve been eating, unfortunately, which means more time at the gym and less time to blog. All excuses aside here’s a little recipe adapted from the brilliant Dave Lebovitz’ “Living the sweet life in Paris” blog. Look here for the original recipe. I came across this recipe on pinterest, a cool little Web page that makes my computer emit a loud time-sucking sound whenever I turn it on. But at least it’s useful. So pin this on your recipe board and bake these biscotti. In that order.
Double Chocolate Orange Biscotti
2 cups flour
3/4 cups cocoa powder
1 tsp cinnamon
1 tsp baking soda
1/4 tsp salt
3 large eggs
1 cup sugar
1 tsp vanilla
1 Tb orange juice concentrate thawed
2 tsp dried orange peel
1 cup sliced almonds
3/4 cups dark chocolate chips
1.) Mix together the flour, cocoa powder, cinnamon, baking soda and salt.
2.) In a separate bowl, mix together the eggs, sugar, vanilla, o.j. concentrate and orange peel.
3.) Add the flour mix to the wet mix in batches.
4.) When combined, mix the almonds and chocolate chips in by hand.
5.) Drop the dough in spoonfuls onto a parchment-lined baking sheet in two long rows. With floured fingers, shape the two rows of dough into narrow, squared off logs. Dust with extra flour for that rustic look or glaze with cream for a more finished look.
6.) Bake for 25 minutes. Remove from oven and let cool completely.
7.) Using a butcher knife and pressing evenly so the biscotti doesn’t crumble, slice the log into 36 pieces.
8.) Arrange the pieces, flat-side down on two baking sheets. Place in the oven and bake for another 8 minutes each side. Let cool before storing.
9.) You can also melt good chocolate and dip the biscotti in the chocolate. The chocolate will harden as it cools. But these were so rich any more chocolate in my mind was overkill.
10.) These will generally keep for a week or two. They don’t usually last longer than that at our house because they get eaten pretty quickly. They’re great with ice cream, a hot cup of coffee or cocoa and especially as a decadent breakfast.
 
During my most recent trip to Penzey's I stocked up on some yummy items for baking. Highly recommend especially the natural cocoa and the Vietnamese Cinnamon. Hugely superior to most of what you find in the stores and well worth the little higher price.

Saturday, November 5, 2011

Two Uses for Leftover Halloween Candy

Got Halloween candy? Here are a couple of creative ways to use it.
Caramel apples rolled in the kids' favorite candies like M&Ms, candy corn and/or Pop Rocks are always in season. Just follow the directions on the back of a bag of caramels to make them. The kids can help wash and dry the apples and insert the sticks as well as unwrap the caramels and customize their own apples. Careful with the hot caramel though.
My favorite way to use the chocolate candy is these decadent Candy Bar Brownies with Chocolate Peanut Butter Fudge Frosting. And they're so simple.
Candy Bar Brownies with Chocolate Peanut Butter Fudge Frosting

2 cups of chopped assorted candy bars (we used Snickers, Kit-Kat, Crunch, M&Ms, Hershey's White Chocolate Cookie Crunch, regular Hershey's bars, Reese's cups, Milky Way and Three Musketeers)
1 bag of brownie mix (and ingredients according to package)
1/2 cup peanut butter
1/2 bag of chocolate baking chips

Preheat oven according to package instructions and grease an 8"x8" pan with Crisco.
1.) Mix the brownie batter according to the package directions.
2.) Fold in the chopped candy bars.
3.) Spread the batter in the pan and bake according to package instructions. Batter will just barely cover the bottom of the pan but don't worry. It will spread as it bakes.
4.) Bake the brownies according to package instructions and let cool.
5.) Meanwhile, melt the peanut butter and chocolate chips in a bowl, one minute at a time, stirring with a spoon until smooth and combined.
 
6.) Spread the frosting over top of the brownies and place in the fridge for an hour until firm. Cut the brownies into squares and serve. Store in a covered container at room temperature. Mmm...

Saturday, August 27, 2011

Lavender Sugar Cookies

I woke up this morning expecting to hear howling winds and torrential rains. Hurricane Irene. But so far, so good. Hope everyone is safe down East. If not for Irene, these Lavender Sugar Cookies would be sandwiched with vanilla ice cream and tucked safely away in my freezer. But buying ice cream this weekend would be tempting fate; we'd be sure to lose power for a week. Not that we'd have trouble polishing off a half gallon of ice cream before it melted. It would be an emergency, after all.

If the storm is stressing you out and you need to relax (and you still have power), Lavender Sugar Cookies are just what's needed. I'm guessing, however, that most of you don't have Lavender Sugar sitting in your pantry. Gasp! No worries, the basic cookie recipe is versatile. Substitute almond flavoring for the vanilla, add the zest of a single lemon or toss in 1 tsp of grated ginger--your choice. If you're lucky enough to have access to a lavender plant, add two tablespoons of the 'leaf', chopped fine, to the sugar/butter mixture for a similar effect. If your lavender is blooming the purple flowers are the most fragrant, so adjust the amount accordingly. Leave out the woody stalk in the middle. You can also purchase lavender sugar online.

So, can you taste the lavender? Yes, you can, but it's not overpowering. First you taste the sugar and the butter and vanilla and then you taste the lavender. It's a sweet/savory combination, a little mysterious. You eat one, think, "Mmm, what is that?" Then you eat another. Lavender Sugar Cookies are dangerous that way. Enjoy them with a cup of herbal tea or a tall glass of milk. Or a half gallon of vanilla ice cream. Stay safe this weekend East Coast.

Lavender Sugar Cookies
Makes 2 dozen

1/2 cup (1 stick) butter, room temperature
3/4 cups lavender sugar
1/4 cup plain sugar for dusting
1 TB vanilla
1 egg
2 cups flour (I use half whole wheat mix)
1/4 tsp salt
1 1/2 tsp  baking powder

1.) Mix together the butter and sugar. Add in the vanilla and egg.
2.) Now I'm supposed to say, "In a separate bowl, mix the dry ingredients..." But who really does that? Mix the flour, salt and baking powder into the butter and sugar.
3.) Separate the dough into two balls on two pieces of plastic wrap. Shape into logs, wrap tightly and place in the fridge for an hour to overnight until firm.
4.) Take the dough out of the fridge and give it a roll on the counter top to get rid of the flat side of the dough where it sat on the shelf. You may need to shape the cookies some with your fingers too.
5.) Preheat the oven to 400'.
6.) Place the extra sugar in a bowl. Slice the dough rolls into two dozen, 1/2 inch pieces. Press each piece into the sugar and place, sugar side up, on cookie sheets. I wanted to use purple decorator's sugar for the tops but couldn't find any at the store. Wouldn't that be pretty though?
7.) Bake for 8-9 minutes, taking out of the oven just when they start to brown and the centers are set and no longer gooey.
8.) Serve with a glass of milk or herbal tea.

Sunday, May 8, 2011

Happy Mothers Day--No-Bake Cookies

My five-year-old is dramatic. Sometimes it drives me up the wall and other times I just have to laugh. Because he says the funniest darn things when he's mad. Here are a few of my favorites:
"I want you to give up, Mommy. Just give up!"
"I'm doooomed! Doooomed!"
"When I have kids I'm not going to treat them like this."
"I don't want to spend the rest of my life in this puny little room!"
"Mommy, put the rear-view mirror down. I want you to see how sad you've made me."
Good grief. And then there are the good days, when he says the most beautiful things. Like when I was watching Julia Roberts and Javier Bardem in Eat, Pray, Love and he said, "Is that you and Daddy?" Why, yes. Yes, it is.

I've baked with Linc since he was a baby. I propped his little vibrating seat up on the counter (sans vibrations) and talked to him while I worked. As he got older he moved to a chair or stool and got his own apron and chef's hat. But lately he's lost interest. He's moving on to big boy things I guess, like soccer and science and video games. Then the other day he looked at me and said, "Mommy, can we bake cookies together again?" We spent the next half hour, side-by-side, talking while we worked. He's big enough now to help measure out the ingredients and stir the pot under my careful watch.

While we waited for the cookies to cool on the parchment paper, we played a game of Trouble and washed the dishes in the sink together. These are the times when I remember that cooking is about more than nutrition and calories and dirty dishes. Cooking is about shared memories and spending time with the ones we love.

Happy Mother's Day, ya'll!
No-Bake Cookies
Makes 2 dozen
3 Tb cocoa
2 cups sugar
1/2 cup milk
1/2 cup butter (1 stick)
1/2 cup creamy peanut butter
1 Tb vanilla
3 cups oats
1.) In a saucepan on low to medium heat, combine the cocoa, sugar, milk and butter. Stir until cooked and the sugar disolves. It won't sound or feel gritty anymore and all the butter will be melted. This is probably the most important part of this simple process. If you don't let the sugar cook long enough you'll have gritty, sugary cookies instead of chocolate peanut butter fudge coated oat cookies.
2.)Remove from heat. Add in the peanut butter and vanilla and stir until the peanut butter is melted.
3.) Stir in the oats until well coated. We use whole oats instead of the quick oats but both will probably work well.
4.) Spoon out the dough onto wax or parchment paper and let cool at room temperature for about half an hour. Cookies will set and be easy to remove from the paper without crumbling when they're ready.

Tuesday, February 22, 2011

Lemon Spritz Flower and Heart Cookies

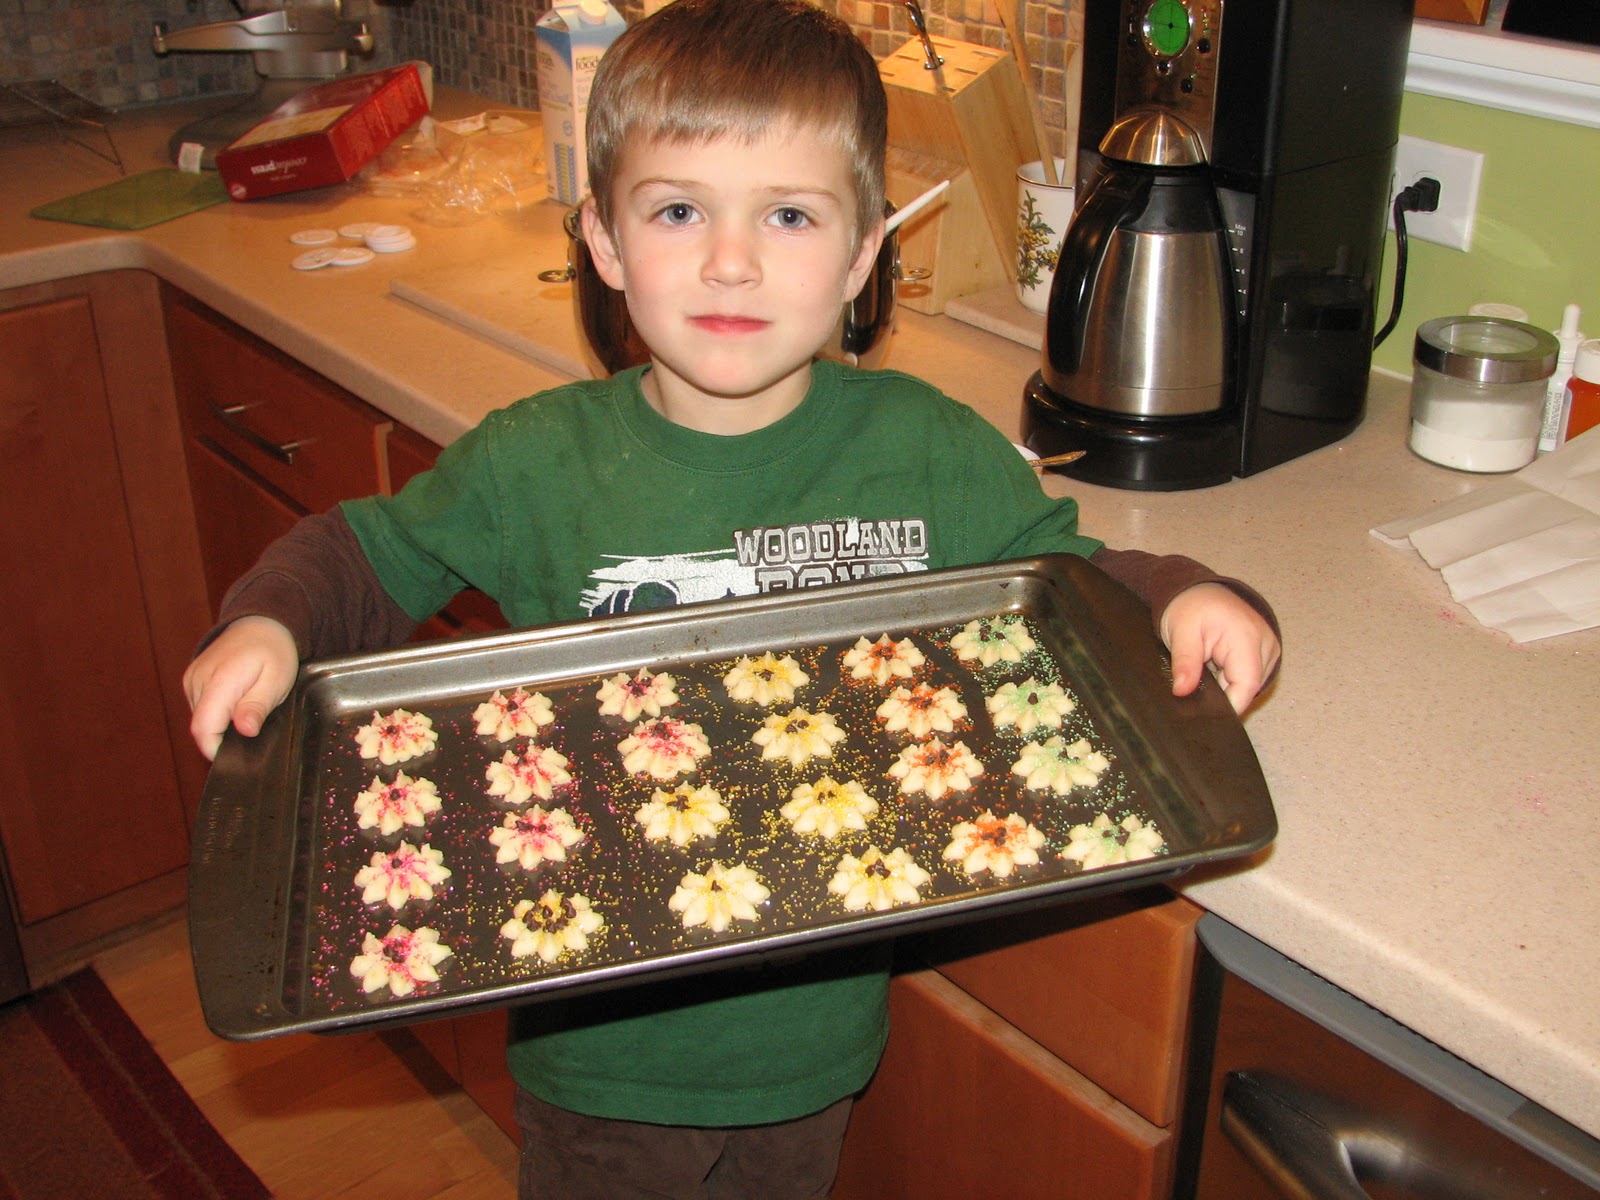
Spritz cookies are usually a Christmas tradition, but the cookie presses these days come with heart and daisy disks that beg to be used for spring and Valentine's Day. Linc was my official decorator--for his usual handling fee in chocolate chips and sugar sprinkles. What can I say? Good help this cute is hard to find.
 As a special treat for Lincoln, I mixed up the usual spritz recipe to make it more like his favorite cookies from the grocery store bakery, a lemon spritz. I have to say, they're pretty darn close and don't have any of that nasty mystery ingredient greasiness. Not that these are health food by any means, with not one, not two, but THREE sticks of butter. Ah well. They're tiny. I'm sure five or six won't hurt. Much.

If you don't have any idea what I'm talking about when I say 'cookie press', here's a photo of one from Wilton for about $10. The model I have is very similar. Two tips to making this press and recipe work--don't grease the cookie sheets and don't chill the cookie dough until after they're pressed out onto the cookie sheets and decorated. Then stick them in the freezer for five minutes while you wait for the previous pan to bake. Freezing the dough once pressed will keep the cookies from puffing up and losing their shape. Also, don't re-use a baking sheet until it's cooled, cleaned with soap and water and dried. That way, the cookie dough will stick to the pan and release neatly. If you find your cookies are sticking to the disks, take a second to run hot water over the disk to get rid of any dough buildup, while it's attached to the press. You should get a nice, clean cookie on the next take. Don't worry, this will all make a lot more sense when you're actually using the press. :-) You can also try the chocolate version of this dough that's on the box (dipped in chocolate would be divine) or use food coloring to color the dough. Other cookie disks in my set include a pumpkin, Shamrock and Christmas shapes.

A cookie press might look or sound complicated, but once you get the hang of it you'll be hooked. How else can you make this many adorable and yummy cookies?


Lemon Spritz Cookies
Makes...too many to count (70-80 is a good estimate)

3 sticks of butter, softened
1 cup sugar
1 egg
1 1/2 Tb fresh squeezed lemon juice
1 Tb grated lemon peel
1 Tb half-and-half or milk
3 1/2 cups flour
1 tsp baking powder


1.) Preheat oven to 375'.
2.) Cream butter and sugar.
3.) Add egg, lemon juice and peel and milk.
4.) Add flour and baking powder, mixing to make a smooth dough.
5.) Drop dough in press by the spoonful, tapping against the counter to help get rid of air pockets. Press out cookies and decorate.
6.) Chill in freezer five minutes before baking.
7.) Bake 8-10 minutes. Don't let them brown.
8.) Cool and move to wire rack to set.

Monday, January 24, 2011

Chocolate Pecan Biscotti


Biscotti is Italian for "twice baked," which is exactly why these hard cookies are easy to store long term or ship as gifts and are perfect for dunking in a hot cup of coffee in the mornings. This recipe has more of a shortbread texture than the pre-packaged biscotti you get at most coffee shops.


TIPS:
  • For smaller biscotti, use two cookie sheets and form the dough into three or four smaller logs. Adjust bake time accordingly. I prefer big, meaty biscotti like these, so I bake as two logs. 
  • I sometimes bake the logs the night before, let them sit out on the counter to harden overnight, then slice and bake the second time the next day if I have time.
  • Try all kinds of different variations for this recipe. One of my favorites is slivered almonds with 3 Tb aniseed and almond flavoring. Another is to add 1/2 cup cocoa  powder and reduce the flour to 3 cups for a chocolate biscotti. Add dried cranberries or cherries. 
  • For an extra yummy touch, dip half of each biscotti in melted chocolate and let set on wax paper. The possibilities are endless.  
Chocolate Pecan Biscotti
 Adapted from the Aniseed Biscotti recipe in the 2005 Taste of Home Annual Recipes cookbook.
When baking as two large logs, this recipe makes about 16 large biscotti.

1 cup butter (2 sticks)
1 cup sugar
3 eggs
2 tsp vanilla
3 1/2 cups all purpose flour
1 1/2 tsp baking powder
3/4 cup roughly chopped and toasted pecans
1 cup (6 oz) good quality chocolate chips

Preheat oven to 325'.
1.) Cream butter and sugar. Add eggs, beating well after each. Beat in vanilla.
2.) Combine flour and baking powder. Beat into wet ingredients.
3.) Using a spatula or wooden spoon, mix in pecans and chocolate.
4.) Divide dough into two large "logs" on a lined baking sheet. Bake for 25-30 minutes or until lightly browned and sounds hollow when you tap lightly on the top. Let cool completely.
5.) Transfer to cutting board and cut into 1" slices with a long, thin serrated knife or butcher knife.
6.) Places slices cut side down on baking sheet and bake an additional 10 minutes. Turn over and bake another 10 minutes until both sides are lightly browned and cookies are hard.
7.) Let cool on wire racks. Cookies will continue to harden as they cool.
8.) Store for one to two weeks.

Monday, January 10, 2011

Make me cookies you will!

More than anything, my five-year-old wants one of those T-shirts that says, "Come to the Dark Side...We have cookies!"  Well, now we really do have cookies on the dark side. One of my favorite Christmas gifts this year was from all my boys--the Star Wars Heroes & Villains cookie press set from William's Sonoma. Once I looked at the beautifully frosted cookies on the box I knew I would have to work out some other way to decorate them. I mean you have to have just the right green for yoda and it isn't the same green as Boba Fett. And how unappetizing is Darth Vader in all that black frosting? So after doing a little research online, I decided to doctor the recipe that came with the kit by adding 1/2 cup cocoa powder and 1 Tb instant coffee granules (to enhance the chocolate flavor) for an Oreo-type cookie. Then I whipped up a buttercream frosting for the filling. OMGosh! Fabulous. Of course, you don't have to use this cookie press. Any cookie cutter will do. Just be sure the image is symmetrical (I think that's the word I'm looking for), so the top and bottom cookies match up. For example, Boba Fett has a little pipe on the left-hand side of his helmet that was on the right-hand side on the bottom cookie, but Vader, the stormtrooper and Yoda worked perfect.

REVIEW: So if you're thinking about buying this set from Williams Sonoma, here's my two cents. I like them. They're $20, but if you have a little Star Wars fan (or a big Star Wars fan) in the house they're fun to have around. I can't wait for his birthday party this year. I feel a Star Wars theme coming on. Lincoln had a great time using them with me. I had to help a little because the dough is pretty stiff. They clean up well and although they don't come with a container, they fit easily in a quart-sized freezer bag for storage. I also kept the recipe info and cut out the small picture of the frosted cookies on the back of the box to keep with the presses for future reference if I decide to tackle actually frosting them.

The Dark Side Filled Cookies
2 1/2 cups all purpose flour
1/2 tsp salt
1/2 cup cocoa powder
1 Tb instant coffee granules
1 1/2 sticks butter (12 Tbs), room temperature
1 cup granulated sugar
1 egg
1 1/2 tsp vanilla

1.) Preheat oven to 350'. Line three cookie sheets with parchment paper.
2.) In an electric beater, beat the butter until smooth, 2 mins. Slowly add the sugar and beat until light and fluffy, 2 mins more. Add the egg and vanilla, scraping the sides to thoroughly combine.
3.) Combine the flour, salt, cocoa powder and coffee granules in a separate bowl. Add the flour mixture to the butter mixture in batches until a stiff dough forms.
4.) Turn the dough out onto a floured surface and shape into two balls. Wrap each ball in Saran Wrap and refrigerate 2 hours to 2 days.
5.) Remove the dough from the refrigerator one ball at a time and let stand 5 minutes. Roll the dough out onto a lightly floured surface (Try using powdered sugar instead of flour) until 1/4-inch thick.
6.) Using the SW press or a cookie cutter, cut out the shapes as desired and transfer to the pans. Be sure to cut out two of each shape so you can make a sandwich with the same images. For the SW presses, I lifted the dough into my hand while still inside the press and pushed the plunger again to get an extra clear imprint of the faces.
7.) Place the cookie sheets with the dough in the freezer for 5 minutes to avoid spreading and puffy cookies.
8.) Bake in the preheated oven for 10-15 minutes, depending on your oven. Remove from the oven and let cool on wire racks while you make the frosting.

Buttercream Filling
1 stick of butter, room temperature
2 cups powdered sugar
1 tsp vanilla
milk or cream, 1 Tb at a time

1.) Beat the first three ingredients until well combined.
2.) Add the milk or cream 1 tablespoon at a time until you get a smooth but thick consistency to your frosting, just thin enough to be spreadable but not so thin it will run off the edges of the cookie when you press them together. Transfer the frosting to a quart-sized freezer bag and cut off one small corner of the bag to use for piping.
3.) When your cookies have cooled, pipe a nice big blob of frosting on the blank side of the cookie and press the other cookie together. Let sit a few minutes to firm up before eating. 

~~~~~~~~~~~~~~~~~~~~~~~~~~~~~~~~~~~~~~~~~~~~~~~~~~~~~
For Christmas, Lincoln got the LEGO Darth Vader Tie Fighter with Vader mini-fig. Just had to include. He's very proud of his handiwork.I also found this great Star Wars snowflake for my background this month.

Friday, December 3, 2010

Gingerbread Men


I wish you could smell this picture. There's nothing like the smell of gingerbread baking in the oven. We started making these at Christmas a few years ago. We enjoy decorating them as a family and then give them away to friends and neighbors. This is our first batch this year and we made 25 or so gingerbread men and then 5 or 6 stars for us to eat. This year I used Royal Icing, which allows you to do all kinds of fun and fancy decorations and sets fast and quick. But really we do very basic things with our gingerbread men so next time I think I will stick with the old shortening icing recipe. I posted both below.

The funny thing about decorating cookies as a family is how everyone's personality shines. Here are my cookies: cute, colorful, a little skimpy on the frosting maybe, but all neatly identical for gifting.

And here are Rich's cookies: such an engineer. I like how he worked the NC State basketball player into the mix. When I pointed out that we were giving these away to other people he said I was stifling his creativity. Yeah, yeah, yeah.

And then we have Lincoln's cookies: generous on the candy. Such a giver. Mommy piped the frosting on his, because the tip I used was too small and you had to really squeeze hard to get it out. The ones he decorated all by himself he got to eat. He was very happy with this arrangement. I know, I'm such a control freak.

The next day, when the cookies were hard, I bagged them up with these cute bags I found at Michael's. The kids and I are going to deliver them this afternoon in our little red wagon to the neighbors. I love where we live but we don't see much of our neighbors. Must be lots of fellow introverts. I guess that's why we all chose to move to a neighborhood with acre lots. So this is a good excuse to say hi.


Gingerbread Men
6 cups flour
1 tsp baking soda
1/2 tsp baking powder
2 sticks butter
1 cup packed dark brown sugar
4 tsp ginger
4 tsp cinnamon
1 1/2 tsp cloves
1 tsp ground black pepper
2 eggs
1 cup unsulfured molasses

1.) Sift together flour, soda, baking powder. Set aside.
2.) Cream butter and sugar until fluffy. Mix in spices, salt, eggs and molasses. Add in flour mixture.
3.) Divide dough in half and form into disks. Wrap in saran wrap and chill in fridge at least 2 hours.
4.) Lightly flour counter and rolling pin. Line baking sheets with parchment.
5.) Preheat oven to 350'.
6.) Roll out first disk of dough, keeping the other in the fridge, to 1/4" thickness. Use large gingerbread men cookie cutters to cut out cookies and transfer to baking sheets.
7.) Bake for 8-10 mins. Let cool and decorate as desired.

Royal Icing
1 lb. confectioners sugar
5 Tbs meringue powder
1/2 cup frosting
Gel paste food coloring
(*Gel paste and meringue powder available at Wal-mart or AC Moore or other craft store.)
Combine all ingredients except gel paste and beat for 8-10 minutes until still peaks form. Add gel paste to change colors as desired. To thin, add water 1 Tb at a time. To make the frosting more stiff add powdered sugar. Freeze any extra frosting for later use.

Shortening Icing
4 cups confectioners sugar
1/2 cup shortening
5 Tb milk
1 tsp vanilla
Blend all ingredients. Color as desired. Freeze any extra frosting for later use.

Tuesday, November 9, 2010

Almond & Anise Tea Cookies


Necessity is the mother of all invention. These cookies came about as I was trying to make traditional aniseed biscotti one night. I was home alone with the kids and in my pajamas. I already mixed the butter, almond flavoring and sugar together when I realized I was short one egg. Yeah, I thought, I could grab an egg from the neighbors but then I'd have to put a bra on. So instead, I dug out an old recipe for anise refrigerator cookies, doubled it, added in my toasted almonds and came up with these.

The aniseed gives a fragrant licorice background to the warm almonds in every tender bite. But like biscotti, Almond & Anise Tea cookies go great with the hot beverage of choice and hold up well over time. I made mine the week before last and enjoyed one with coffee tonight after dinner. Still yummy. When you double the recipe (as I have below) you have enough to mail off to loved ones for the holidays. These cookies can take the jostling, so share the love.

You don't have to love licorice to like these cookies. I made these for my hubby, who loves licorice, but I love them too. You can grind the aniseed in your food processor for a stronger licorice flavor and lighter texture. I liked the milder flavor and chewy texture of the whole seeds against the crunch of the toasted almonds. I purchased my seeds at a spice store at our local flea market. You might find it in the grocery store or you can get it at Penzey's Spices online. Or email me. I have a big tub of it and am happy to share.

Almond & Anise Tea Cookies
1 cup butter
2 cups sugar
2 Tb almond flavoring
2 eggs beaten
4 tsp aniseed
3 1/2 cups flour (I use a mix of whole and white wheat)
1/2 tsp salt
3 tsp baking powder
1 cup slivered almonds, lightly toasted and cooled

1.) Blend butter, sugar and almond flavoring.
2.) Add beaten eggs and aniseed.
3.) Mix flour, salt and baking powder in separate bowl and add in batches to wet mix.
4.) Mix in slivered almonds by hand.

5.) Separate dough into thirds. Place each third on a sheet of plastic wrap, parchment paper or wax paper. Form into a log and seal. Refrigerate one hour or overnight.

6.) When chilled, slice in 1/2 inch pieces and bake 400', 10 minutes. Makes 3-3 1/2 dozen cookies.
Related Posts Plugin for WordPress, Blogger...